Red Dead Redemption
With the recent rerelease ofRed Dead Redemption , including afirst - time personal computer going , many new thespian are getting to explore John Marston for the first time . LikeRed Dead Redemption 2 ’s random events , players are able to find a hoarded wealth mathematical function aftersaving an NPCfrom a brigand attack . instead , they canloot the mapfrom the NPC ’s body if they are stillborn in saving him . Like many other encounters , this one is best found bykeeping an spike outfor a rallying cry for avail and look into the situation .
Once you come up the treasure cache from the first single-valued function , you ’ll also loota second mapleading to the next hoarded wealth . This will repeat until you line up atotal of nine treasure caches , each arrest a unequalled gold barroom and the map to the next localization . After finding them all , you ’ll also unlock free stage ride and a new equipment item .
1How To Find Treasure Maps
X Doesn’t Mark The Spot
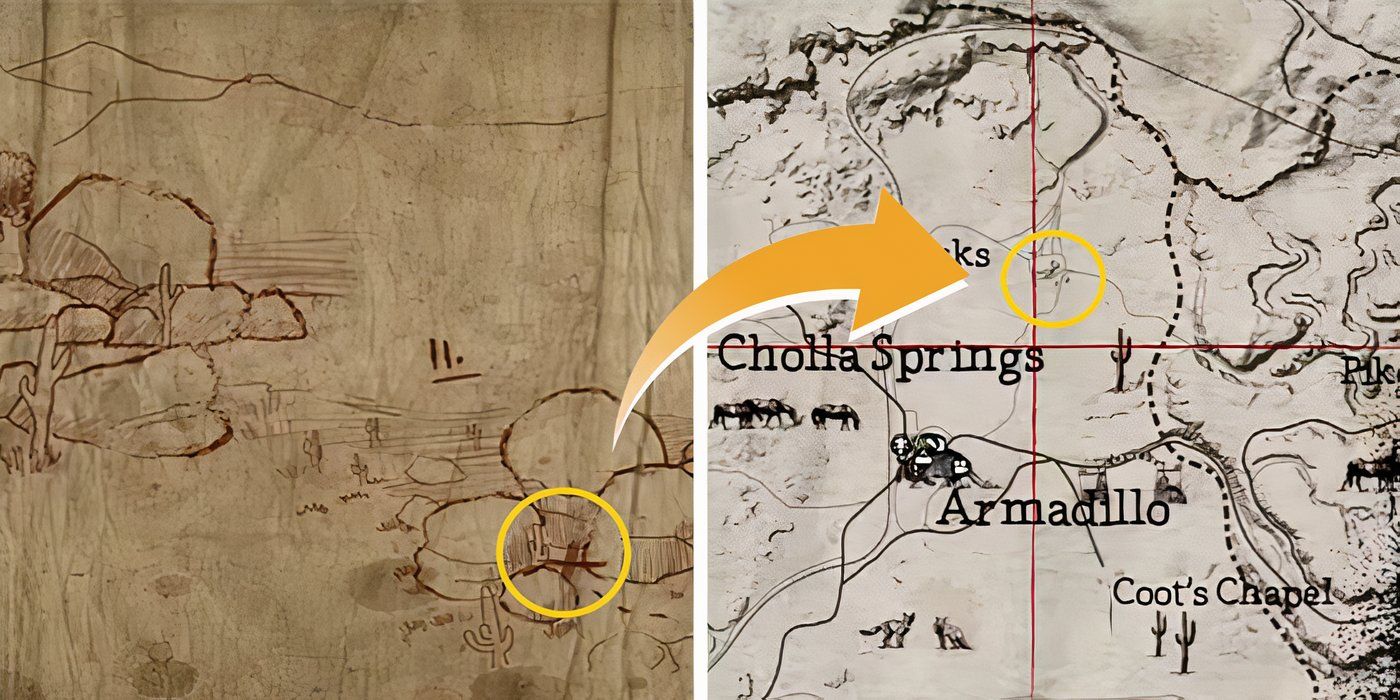
Like most treasure mapping , it depict adrawing of the surrounding areawhere the treasure can be regain . The X does n’t necessarily mark the exact smudge where John can find the hoarded wealth , but it does lead players to the right landmark andtowns inRDR . Several treasure maps also have instructions on exactly where to walk to gain the cache , so make trusted topay attention to your directionsand keep abreast them accurately .
2First Treasure Map Location
Finding Rhode’s Gold
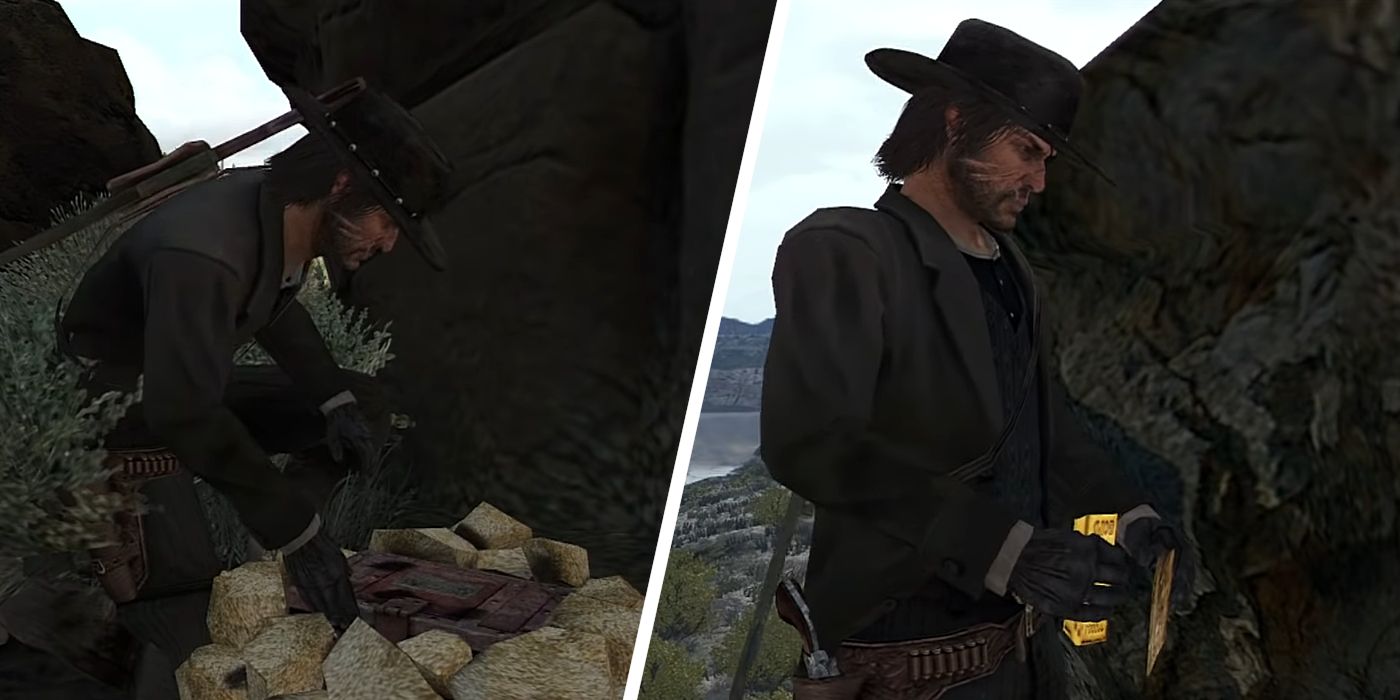
With a PC port of Red Dead Redemption on the view , it ’s a great metre to think about some of the game ’s best features over its prequel , RDR2 .
Behind it , you ’ll see a muckle of crushed rock you could interact with to obtain the cache . After activate it , John will compass through the careen to get your wages . You ’ll recollect theRhode ’s Gold ginmill and the second treasure map .
3Second Treasure Map Location
Finding Jackson’s Gold
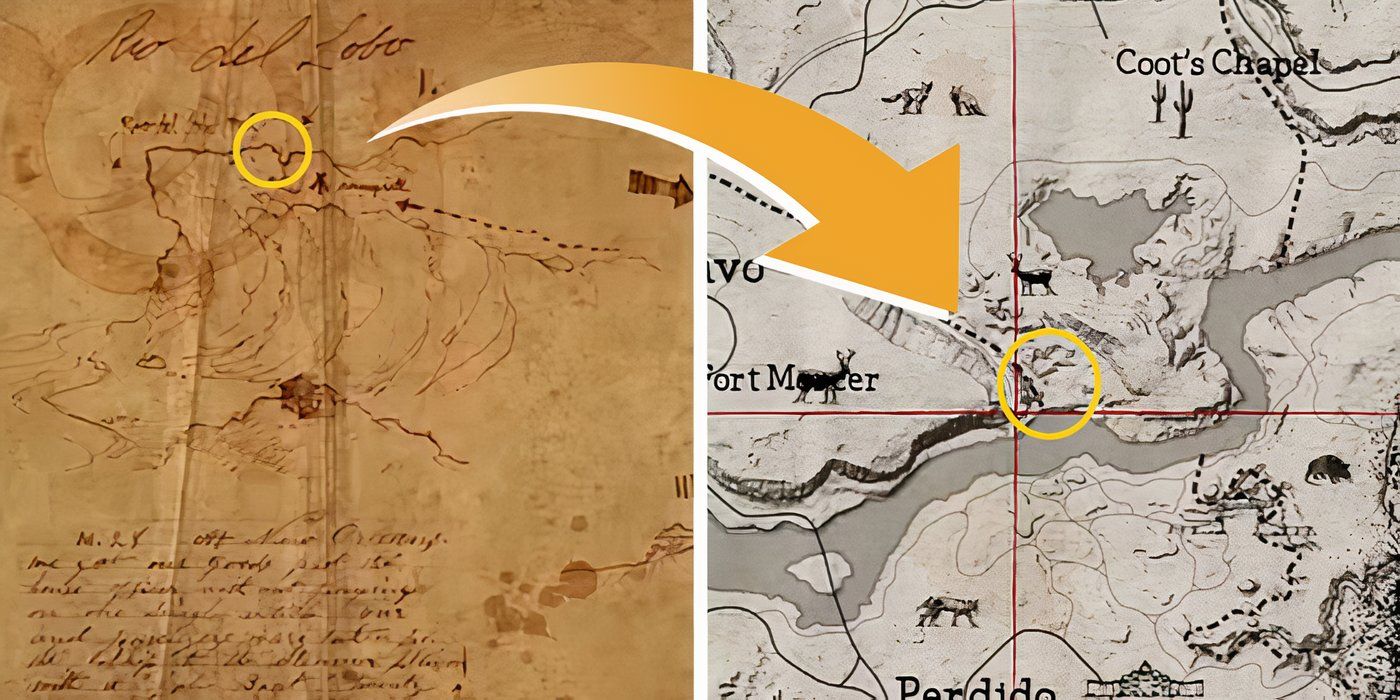
The next location is a bit more complex , necessitate you to follow a three - stride guide to carefully climb down a cliff . Just north ofDel Lobo Rockalong the Rio Del Lobo , you ’ll find anabandoned campsitealong the cliff . Very carefully , pass between the two bouldersshown on the gem function to wind your room down the drop-off .
There are several areas where John can slip and precipitate and a touch-and-go parachuting to a gloomy ledge . Player7has a expert YouTube videoshowing you precisely where to walk without fall . Be very careful , and you ’ll reach the down shelf where you’re able to retrieve the gem cache . deep down , you ’ll detect thethird treasure mathematical function and Jackson ’s Gold taproom .
4Third Treasure Map Location
Finding Calhoun’s Gold
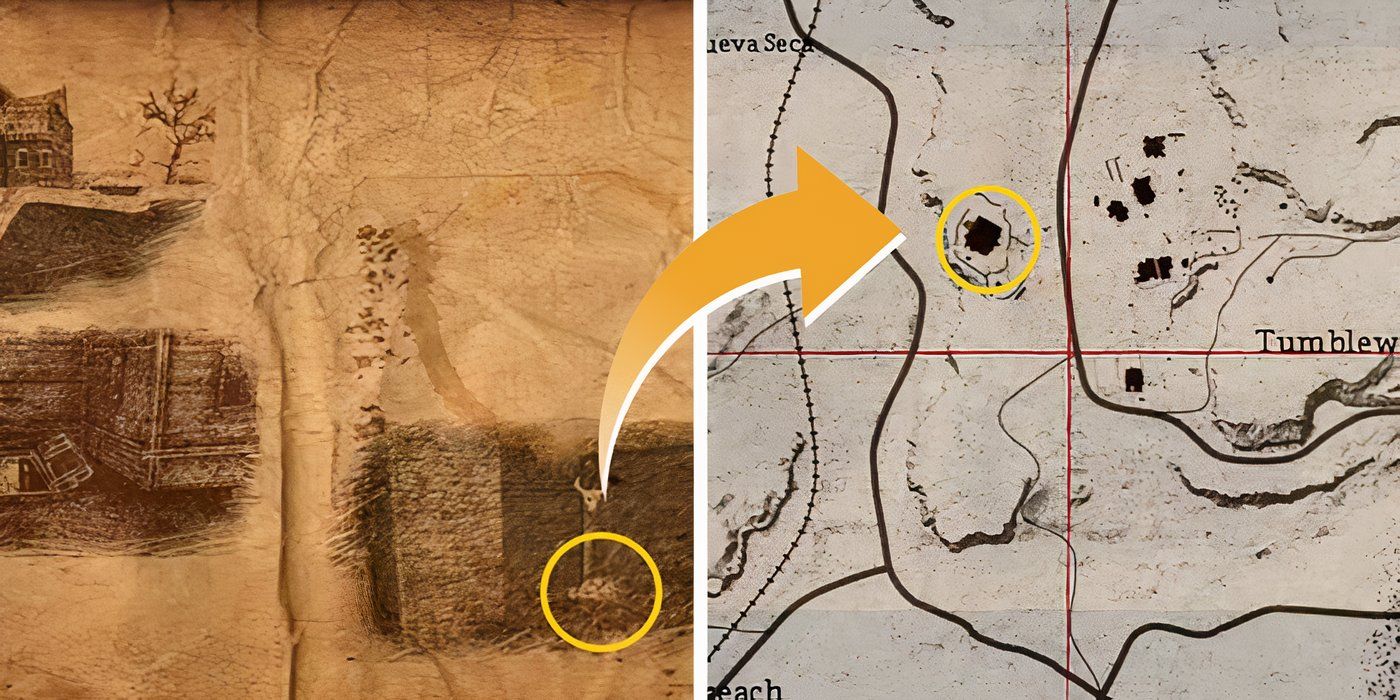
The third treasure map lead you to anabandoned houseon a hill just to theWest of Tumbleweed . Head around theback left sideof the house , and you ’ll seeopen cellar doorsleading to the basement .
Climb the stair and under the house , then head to theback of the room . The hoarded wealth cache will be in the middle of the far wallunder the bull ’s skulland will give youCalhoun ’s Gold bar and the 4th hoarded wealth map .
5Fourth Treasure Map Location
Finding Tubman’s Gold
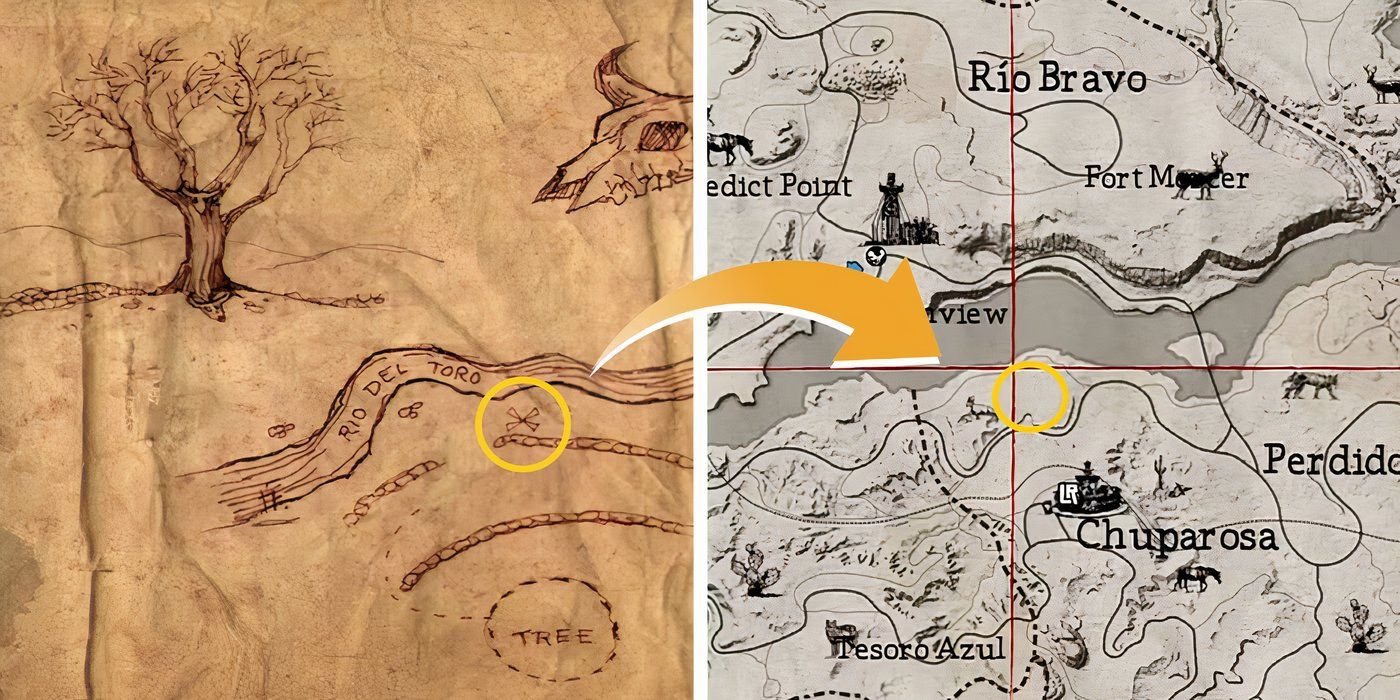
you’re able to only reach this area after you ’ve completedall New Austin quest .
Once you open it , you ’ll obtain thefifth treasure function and Tubman ’s Gold bar . You ’ll also now reachTreasure Hunter Rank Five , which unlock the power totake stage drive for free .
6Fifth Treasure Map Location
Finding Brown’s Gold
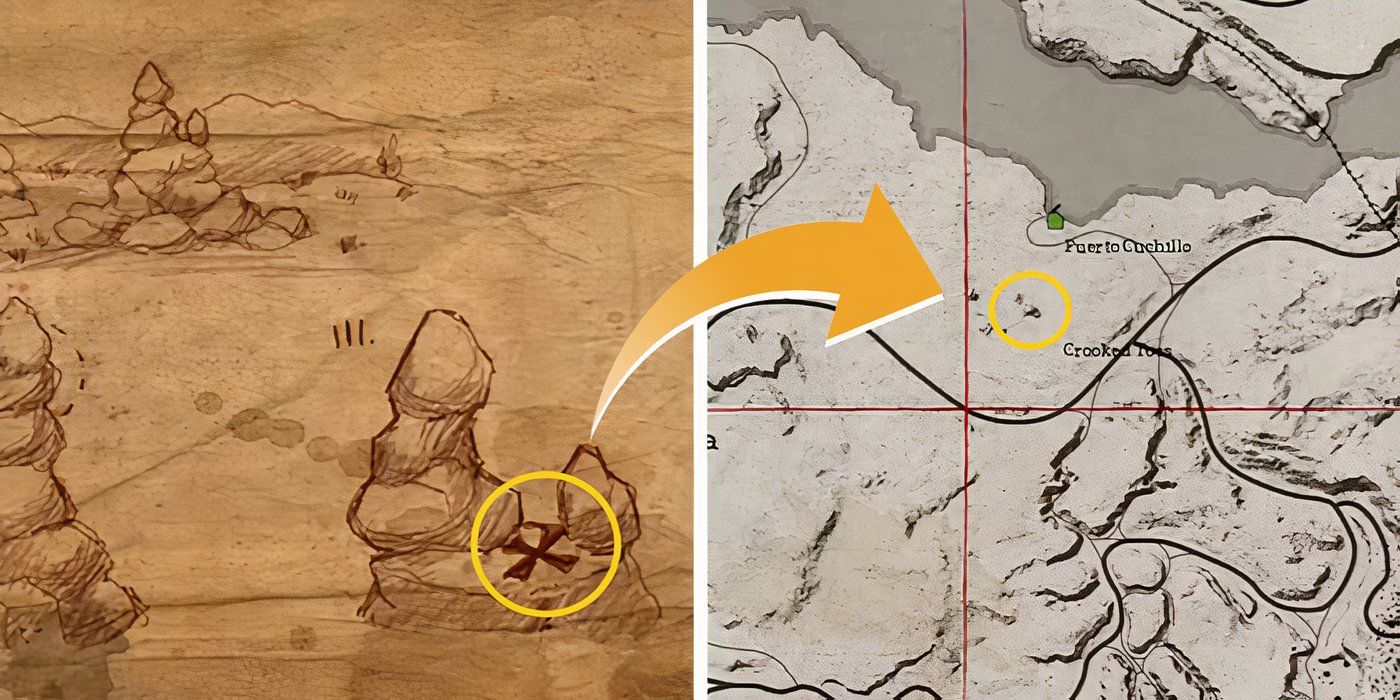
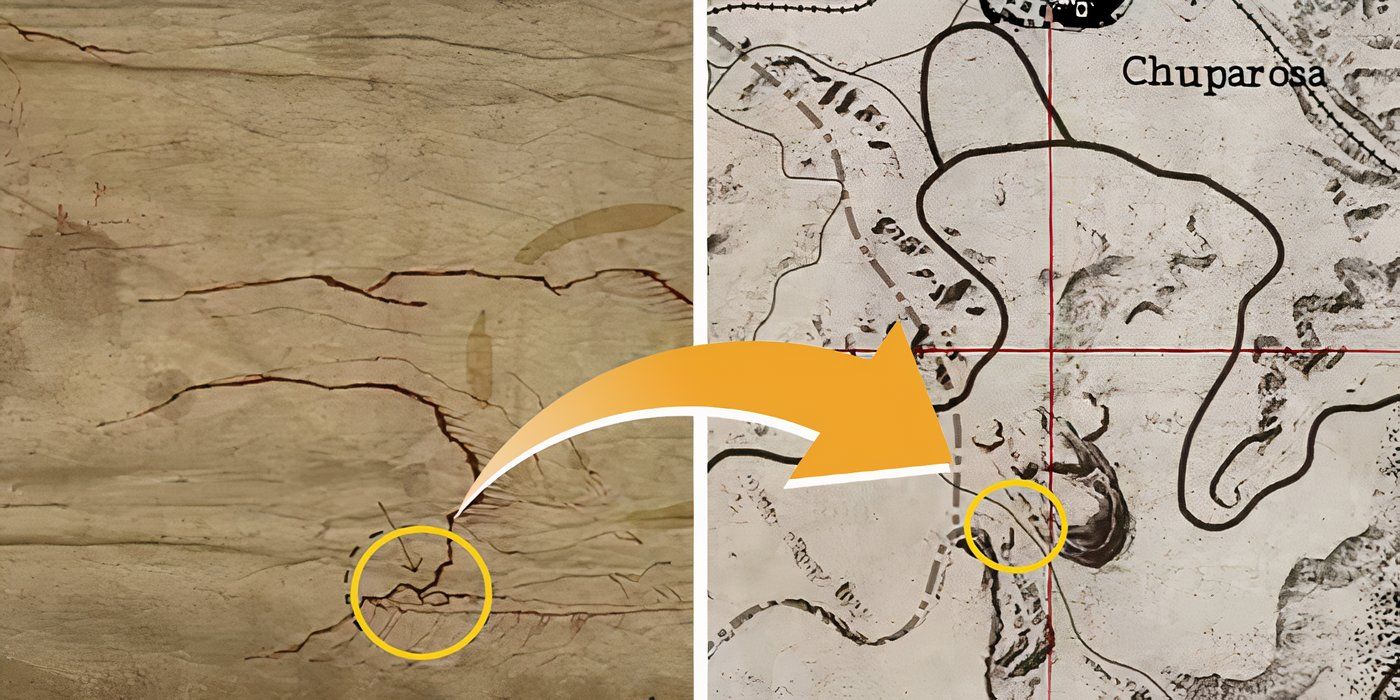
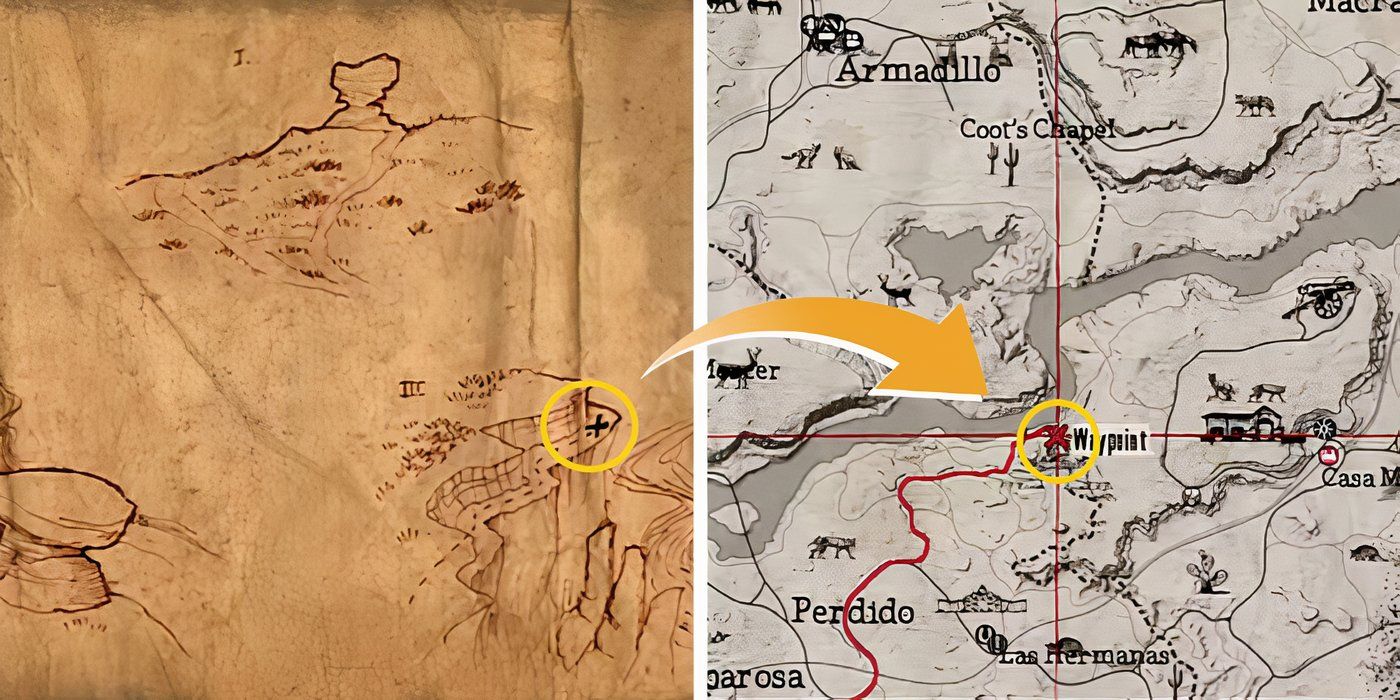
The fifth hoarded wealth cache location is on the main mapping to theWest of the Crooked Toeswaypoint . Once you reach this area , you ’ll seeseveral tall rock candy spiresclustered around one another . rise the taller one , which hastwo private rocky apex .
You should be able toclimb to the topeasily by curving around the structure . Once at the top , the treasure cache will bebetween the two tip . You ’ll findBrown ’s Gold legal profession and the 6th treasure mapping .
7Sixth Treasure Map Location
Finding Douglass’s Gold
The sixth single-valued function leads you to theOjo del Diablolandmark , a tall arch cross the road . If you ’re do up from the South , look to the archway ’s left-hand side , where you ’ll take to climb up to a shelf .
Once on the shelf , the hoard can be foundnext to a single boulder , separate from the other small cluster of rock and roll . Here , you ’ll find theseventh map and Douglass ’s Gold bar .
8Seventh Treasure Map Location
Finding Garrison’s Gold
The seventh hoarded wealth single-valued function is toilsome than the others , as you ’ll need toapproach the mountain from the West sideto attain the top . Once you reach the top of the deal , lead to the Eastand look for a shelf sticking out below the principal tableland .
You ’ll be able to see the cacheon the shelf before chute . Once you locate it , skip down to the ledge and dig up the treasure . You ’ll get theeighth hoarded wealth map and Garrison ’s Gold prevention .
9Eighth Treasure Map Location
Finding Pickett’s Gold
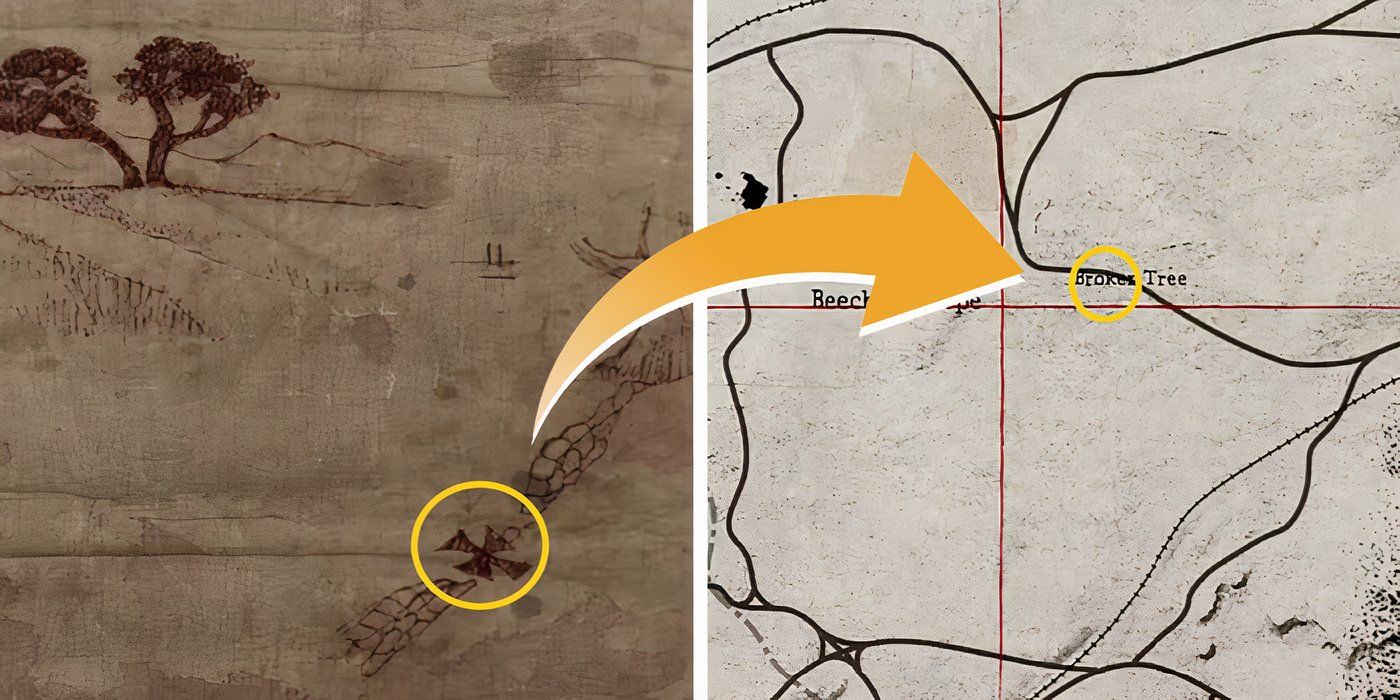
The eighth gem is found at theBroken Tree map waypointto the West of the Great Plains . You ’ll need to havecompleted all the Nuevo Paraiso queststo entree the West Elizabeth orbit . Head to the stock split tree , and you ’ll see anormal treasure chestthat you could loot .
Beyond the bureau is a pit fence with several broken division . Along the crushed fence lineis the treasure cache , where you ’ll findPickett ’s Gold bar and the 9th treasure mapping .
10Ninth Treasure Map Location
Finding Stonewall’s Gold
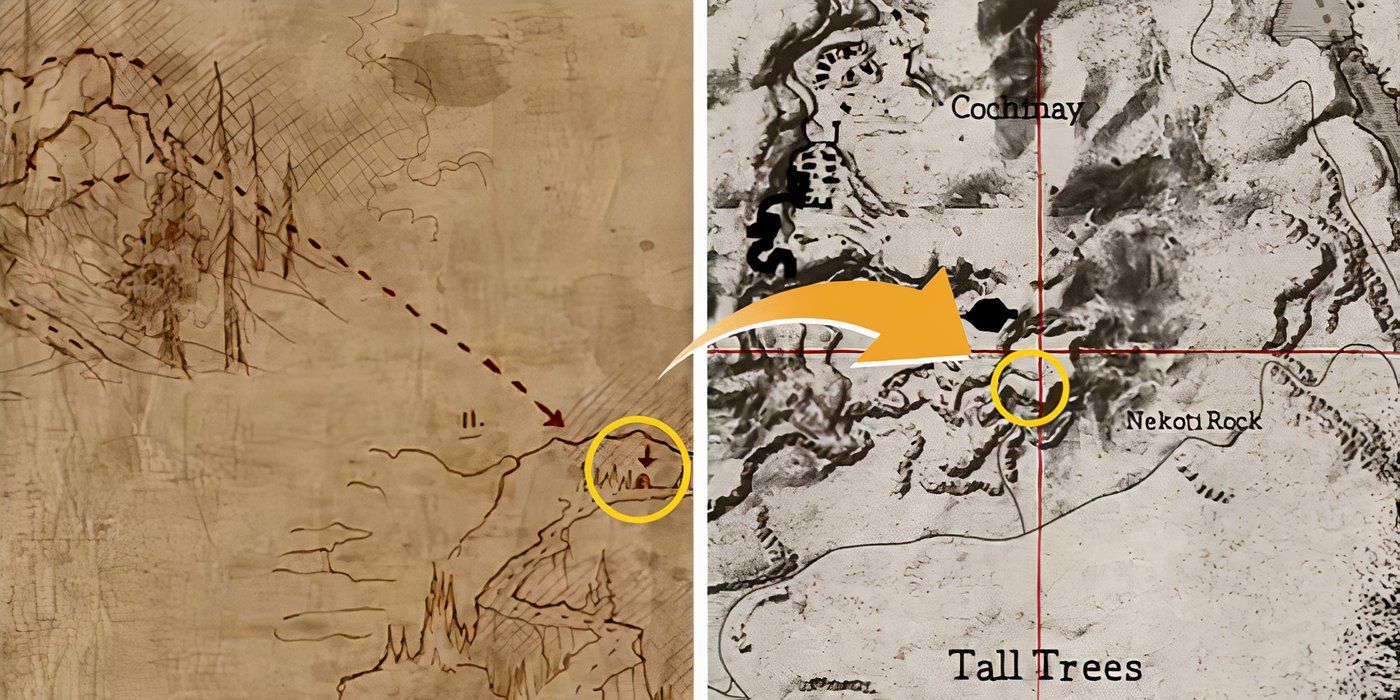
The final treasure cache is found in thesnowy northerly neighborhood , due North of Tall Trees . The treasure function testify where John will need toclimb the mountain to find a cave at the top . Enter the cave , where you ’ll find another even gem chest of drawers , and the treasure cache will bealong the back wall .
Finding this final stash inRed Dead Redemptionwill give you Stonewall ’s amber taproom . However , you ’ll also now reachTreasure Hunter Rank 10 , which devote you theTreasure Hunter ’s Satchel . This raise satchel allow John tocarry double as many consumable items .
Video Credit : Player7 / YouTube

Your Rating
Your input has not been deliver
Custom Image by Katarina Cimbaljevic
Credits: Rockstar Games
Credits: Rockstar Games

Credits: Rockstar Games


